Application Registration
Table of contents
How to register the newly created application
Start by navigating to the App registrations service.

Search for the newly created elqano SSO application.

Navigate to the app registration App roles tab.

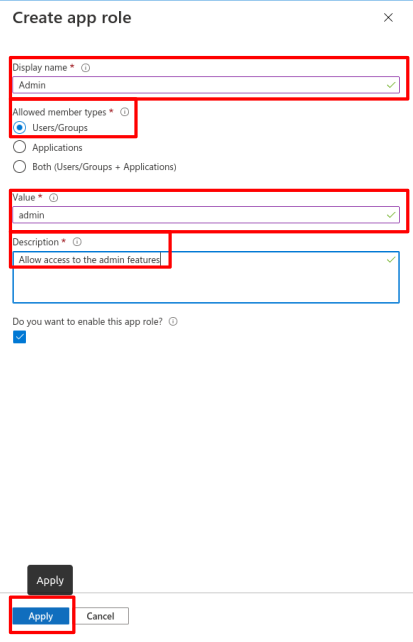
Create Admin and Users App roles.
Admin app role details:
- Display name: Admin
- Allowed member types: Users/Groups
- Value: admin
- Description: Allow access to the admin features
- Check Do you want to enable this app role?
User app role details:
- Display name: User
- Allowed member types: Users/Groups
- Value: user
- Description: Allow access to the user features
- Check Do you want to enable this app role?

Assign Users and Groups to the SSO Application
In order to allow users to connect to Elqano via the Azure AD SSO, you will have to assign Users or Groups to the application.
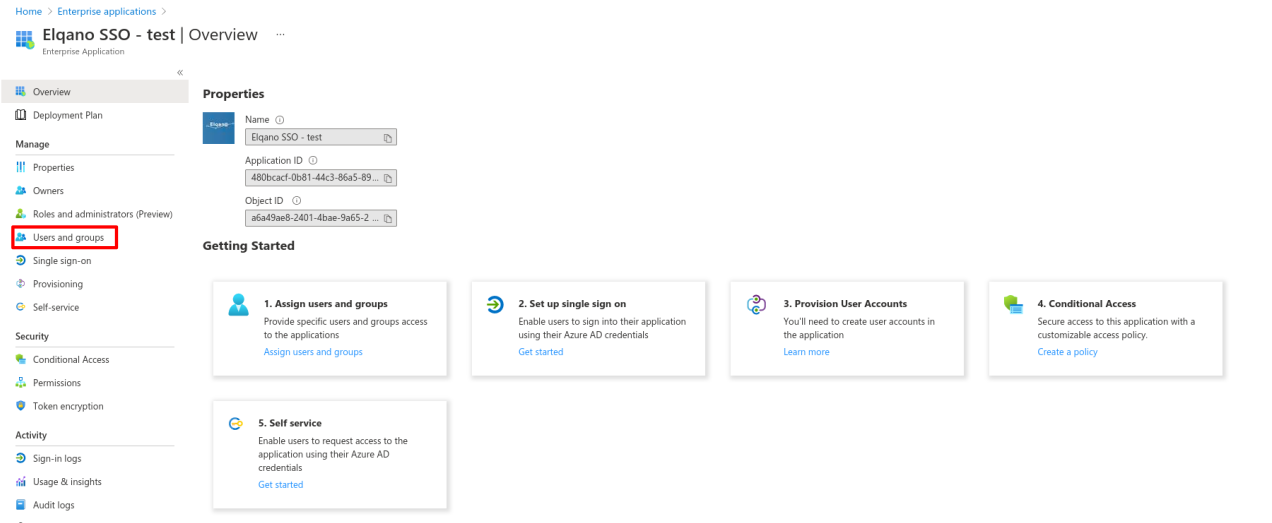
To do so, navigate to the newly created “Enterprise Application” and select the Users and Groups section on the left.
In that section, you will have to assign Users and Groups to give them the ability to connect to Elqano.
Note: To grant user or group access to the admin features, you will need to select the Admin role when assigning it to the app.
Once you have created the app roles, you can assign them by returning to the already created Entreprise Application.
Navigate to the Elqano SSO entreprise application and go to the users and groups section.

Add new users’ and/or groups’ roles.

Assign User and Admin roles.

IMPORTANT: Azure AD does not support nested group permissions for external applications. It meams that if you assign a group to the application, only direct members of this group will have access to Elqano, not the members of another group assigned to a first one.