SharePoint Connection
This guide explains how to connect SharePoint to Playground Pro. This procedure should only be performed by your company’s General Azure Administrator.
Note
This procedure applies only to Playground Pro. If you are using Playground Enterprise, SharePoint connection is configured during installation.
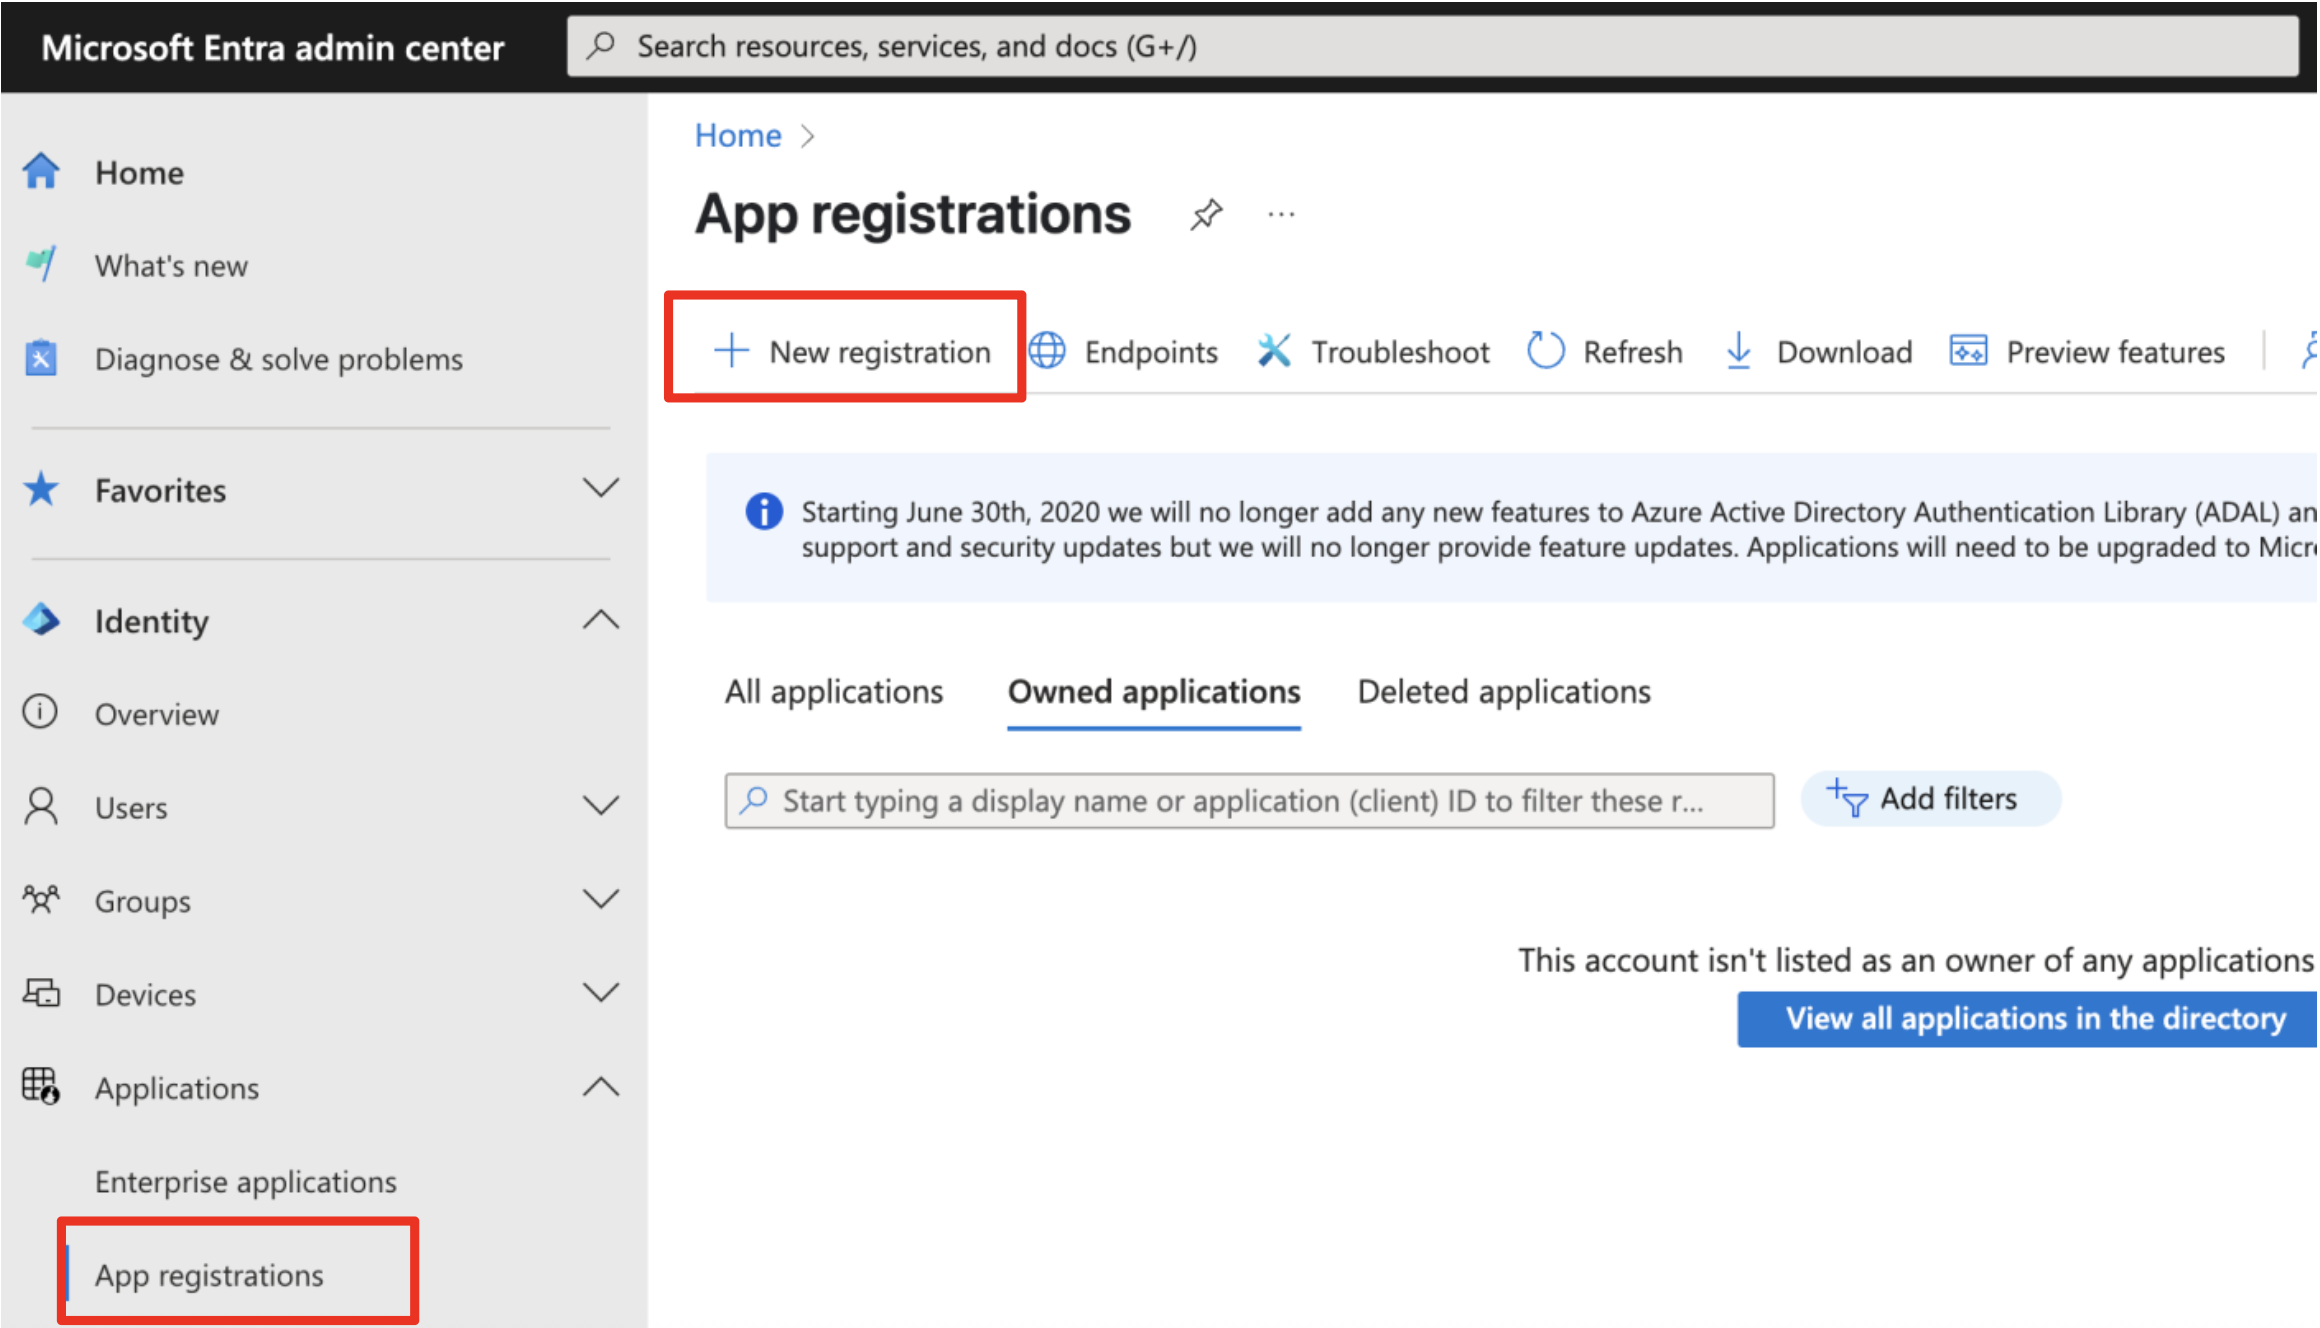
Azure Application Registration
Access Azure Portal
Go to Microsoft Entra ID (formerly Azure AD)
Create a New Application Registration
Navigate to Applications > App Registrations > New Registration
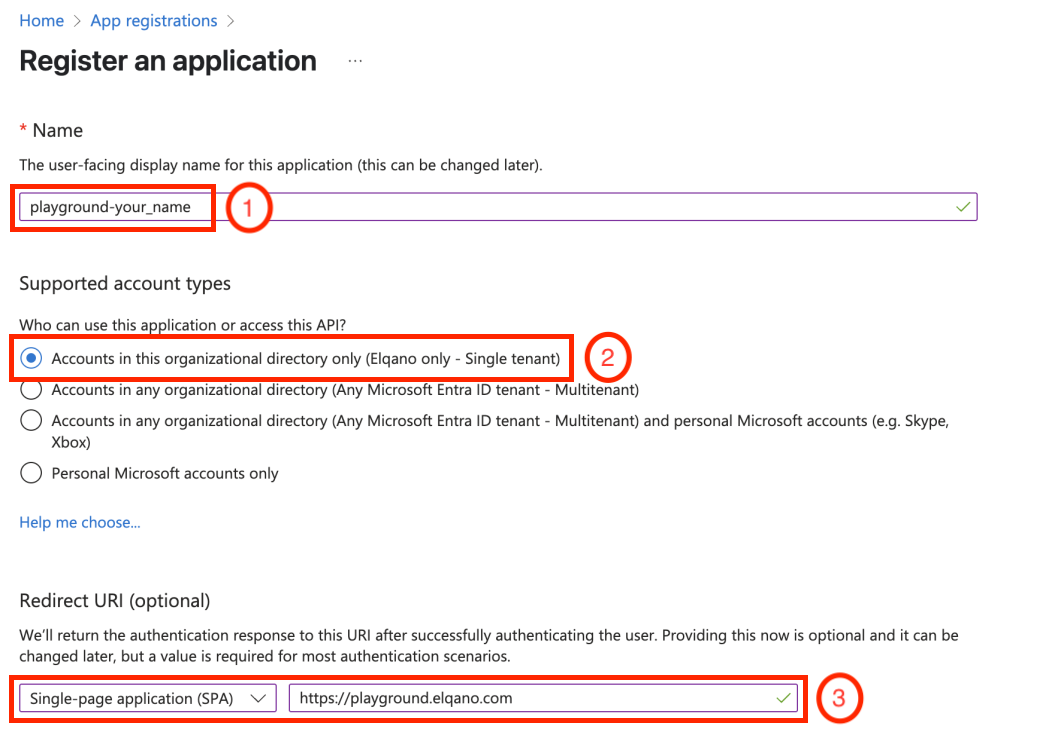
Register the New Application
Fill the following details and validate
- Name:
playground-your_name - Supported account types: Single tenant
- Redirect URI Platform: Single page application (SPA) URL:
https://playground.elqano.com
Get Azure Tenant ID and Microsoft App ID
After registration, note down the Azure Tenant ID and the Microsoft APP ID - you will need these later.
Please note that in the azure portal these values are named Directory (tenant) ID and Application (client) ID respectively.

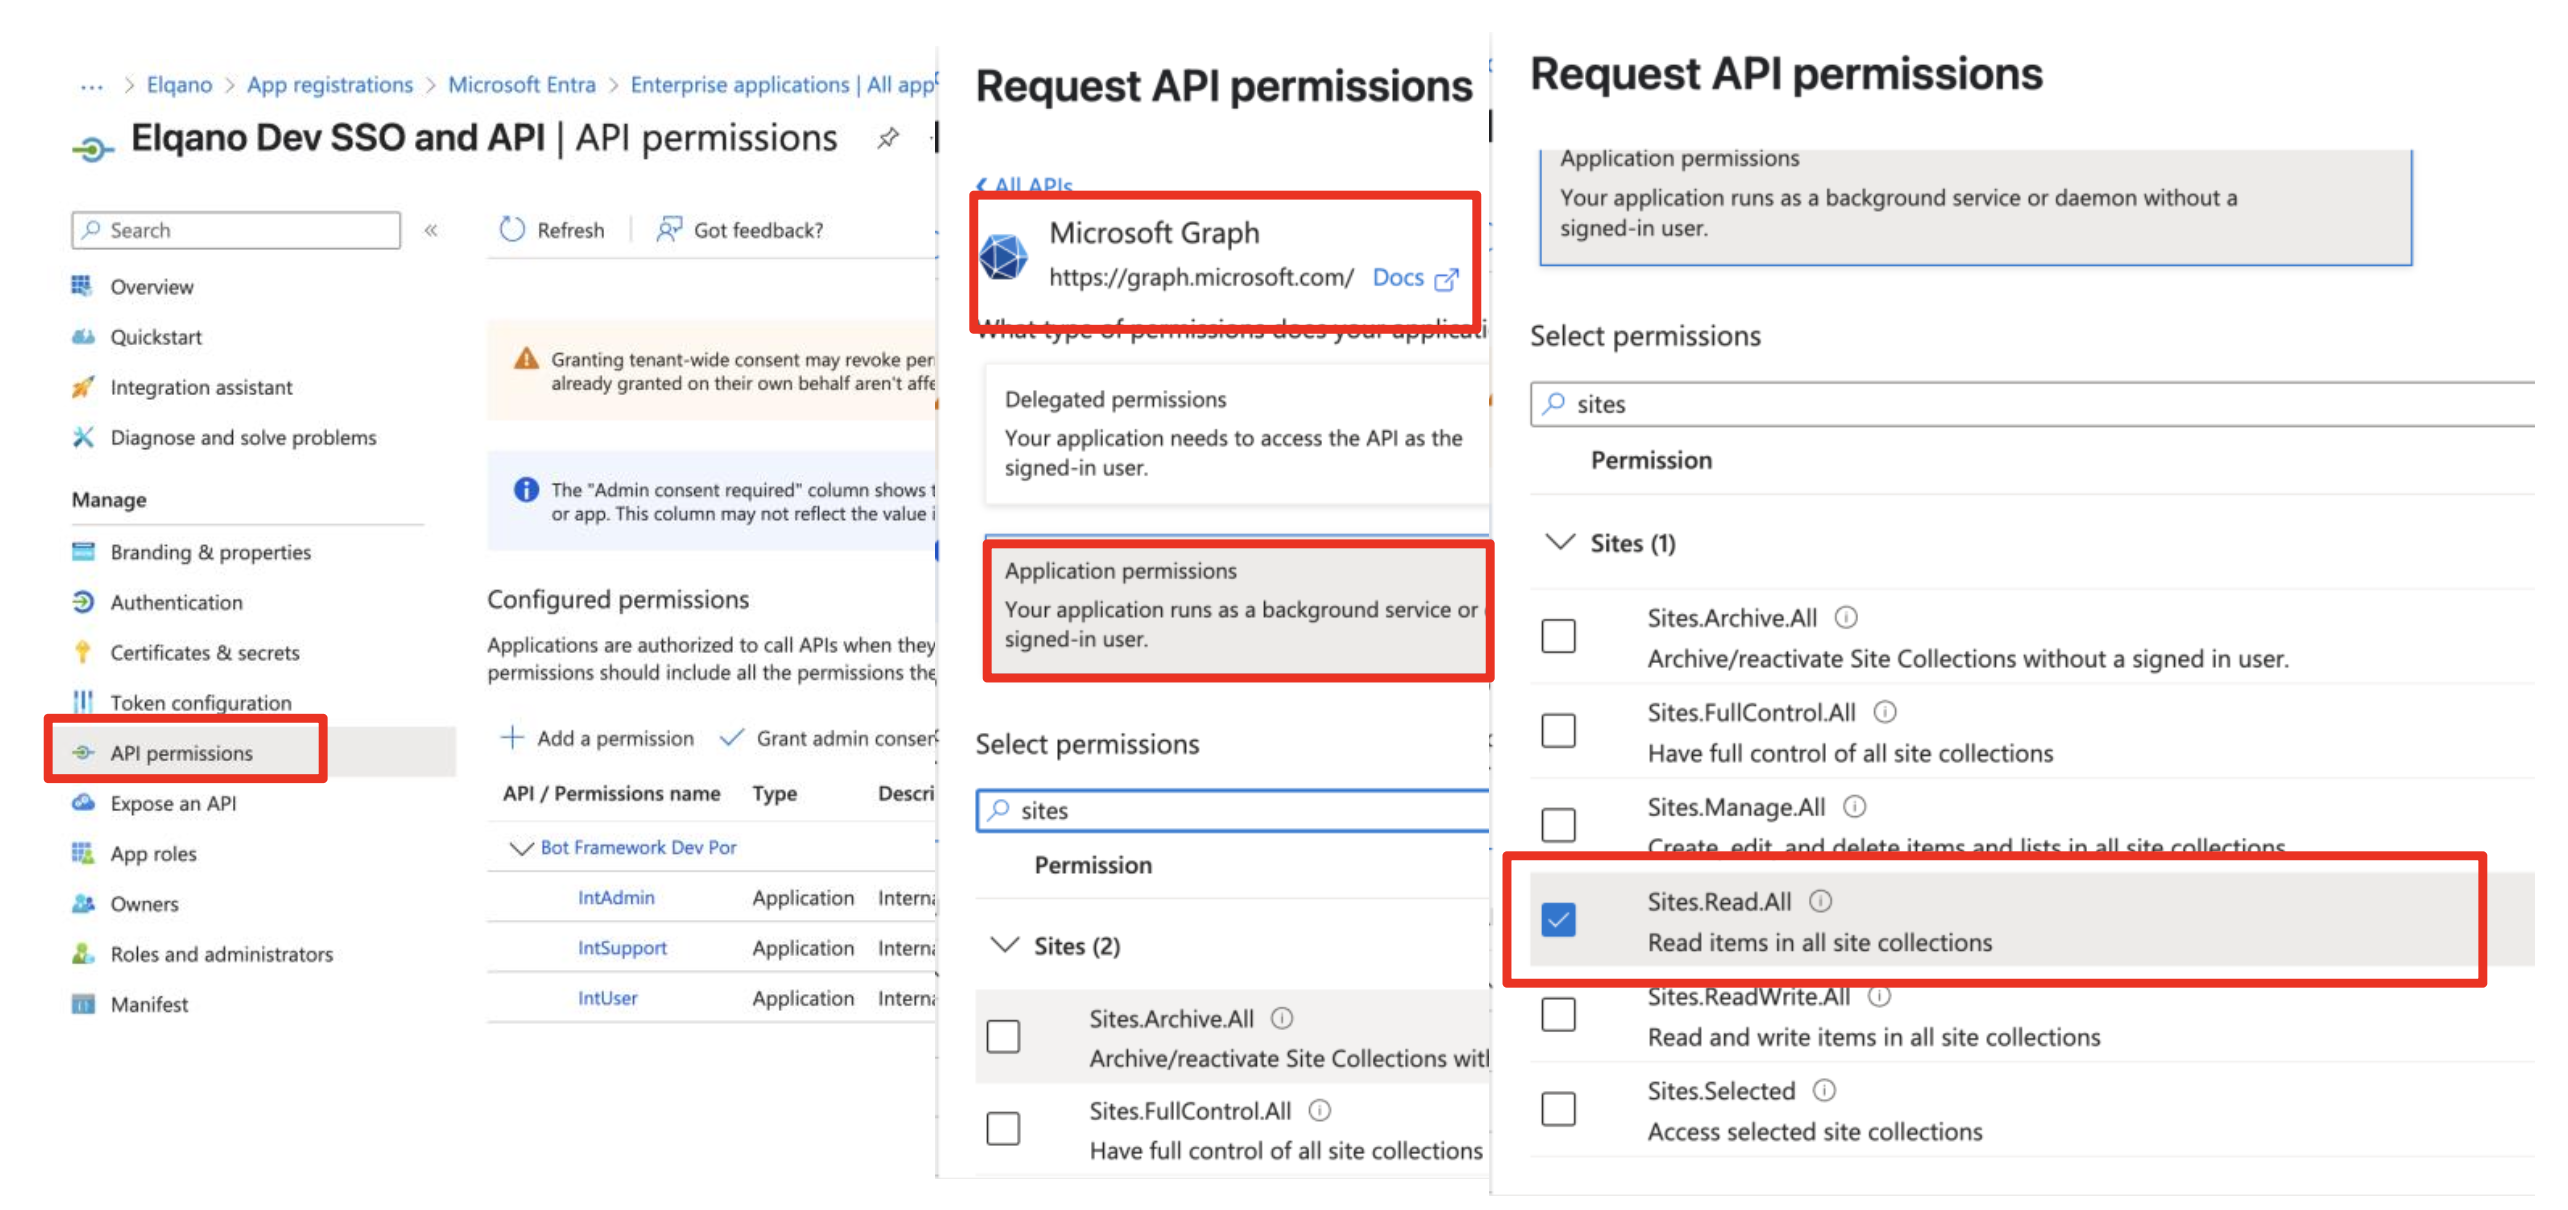
Configure Permissions
Playground needs a combination of application and delegated permissions. This is the list of all the permissions needed by Playground to properly work.
| Application Permissions | Delegated Permissions |
|---|---|
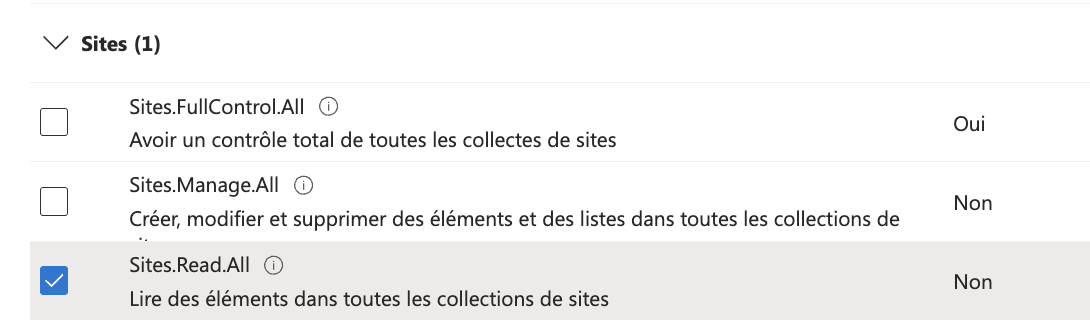
| Sites.ReadAll | Sites.Read.All |
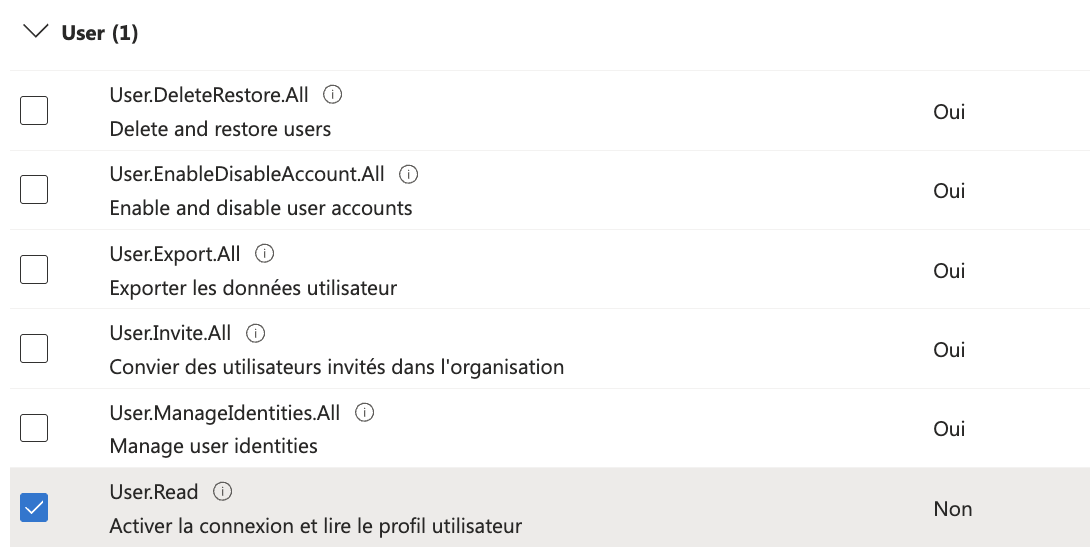
| User.Read | |
| offline_access | |
| openid | |
| profile |
Warning
Sites.Read.All permission must be both Application permissions and Delegated permissions
To grant the permissions, follow these steps:
- Go to Manage > API permissions
- Click Add a permission
- Select Microsoft Graph > Application permissions
- Search for and select Sites.ReadAll
- Click Add
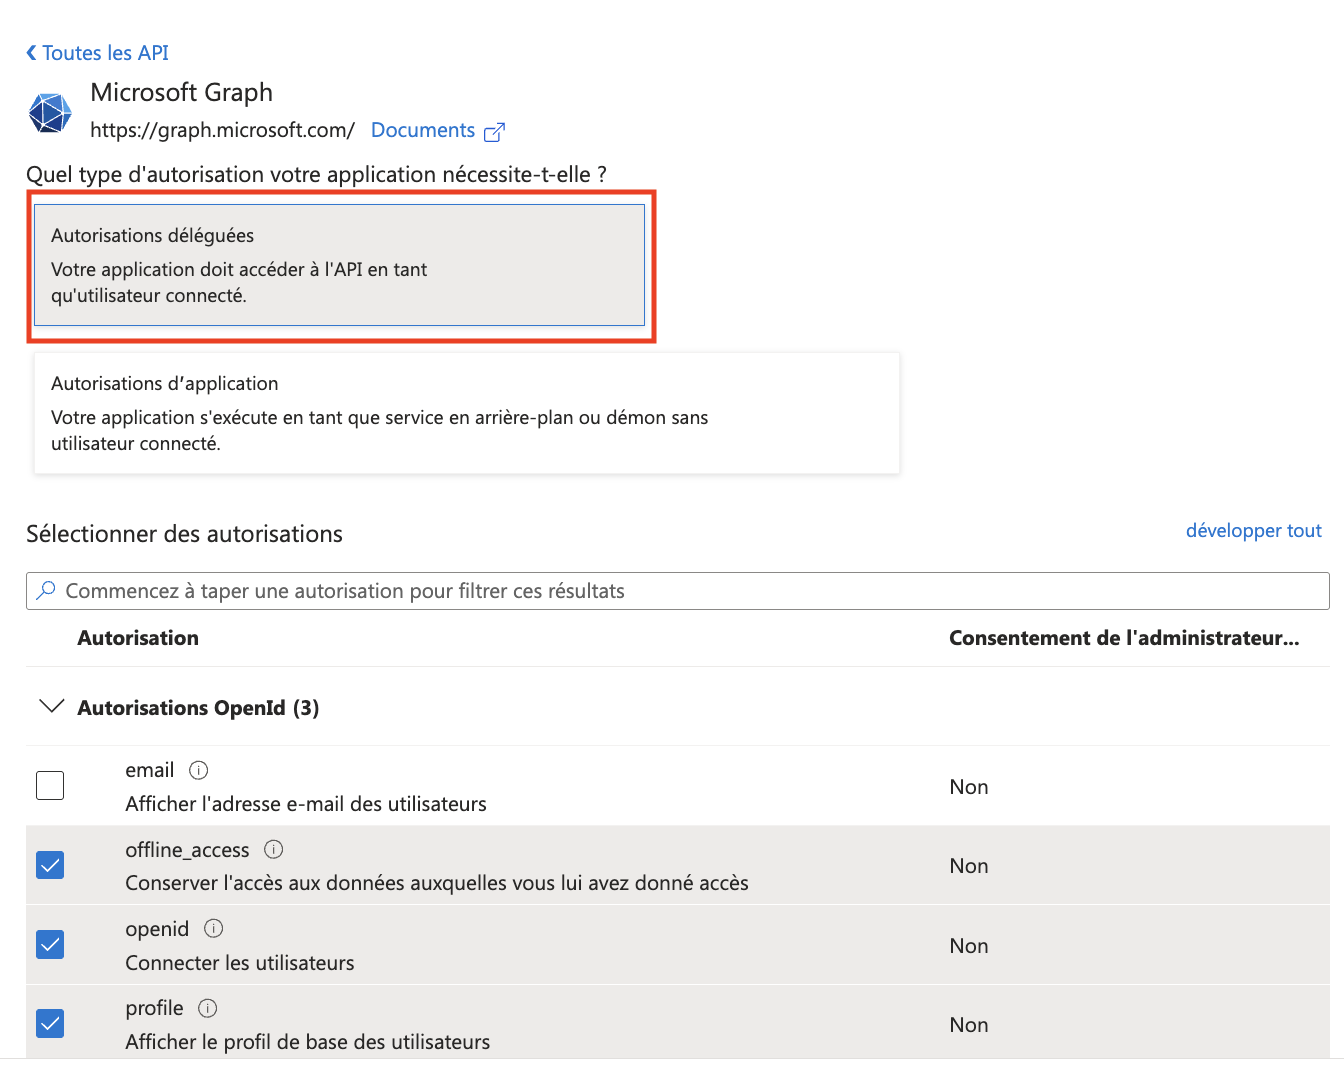
- Add delegated permissions: Select Microsoft Graph > Delegated permissions and selected:
- Sites.Read.All delegated,
- User.Read,
- offline_access,
- openid,
- profile,
Grant Admin Consent
Click the Grant admin consent button to approve the permissions for your organization.
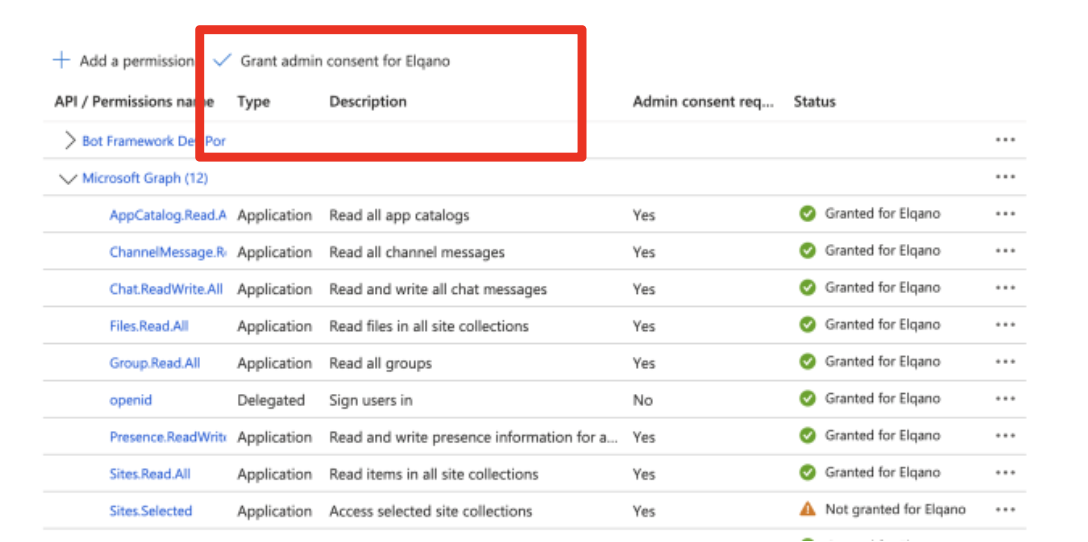
Warning
Do not skip this step, otherwise the Playground users will not be able to connect to SharePoint
Allow users to connect to playground
In some organizations, users may need to request app permissions approval from administrators when they cannot give consent themselves. These requests can be managed at Azure Portal - Enterprise applications - Admin consent requests.
Create Microsoft App Password
- Go to Certificates & secrets
- Click New client secret
- Note down the generated secret value: this is the Microsoft App Passwordt that you will need later and it won’t be shown again.
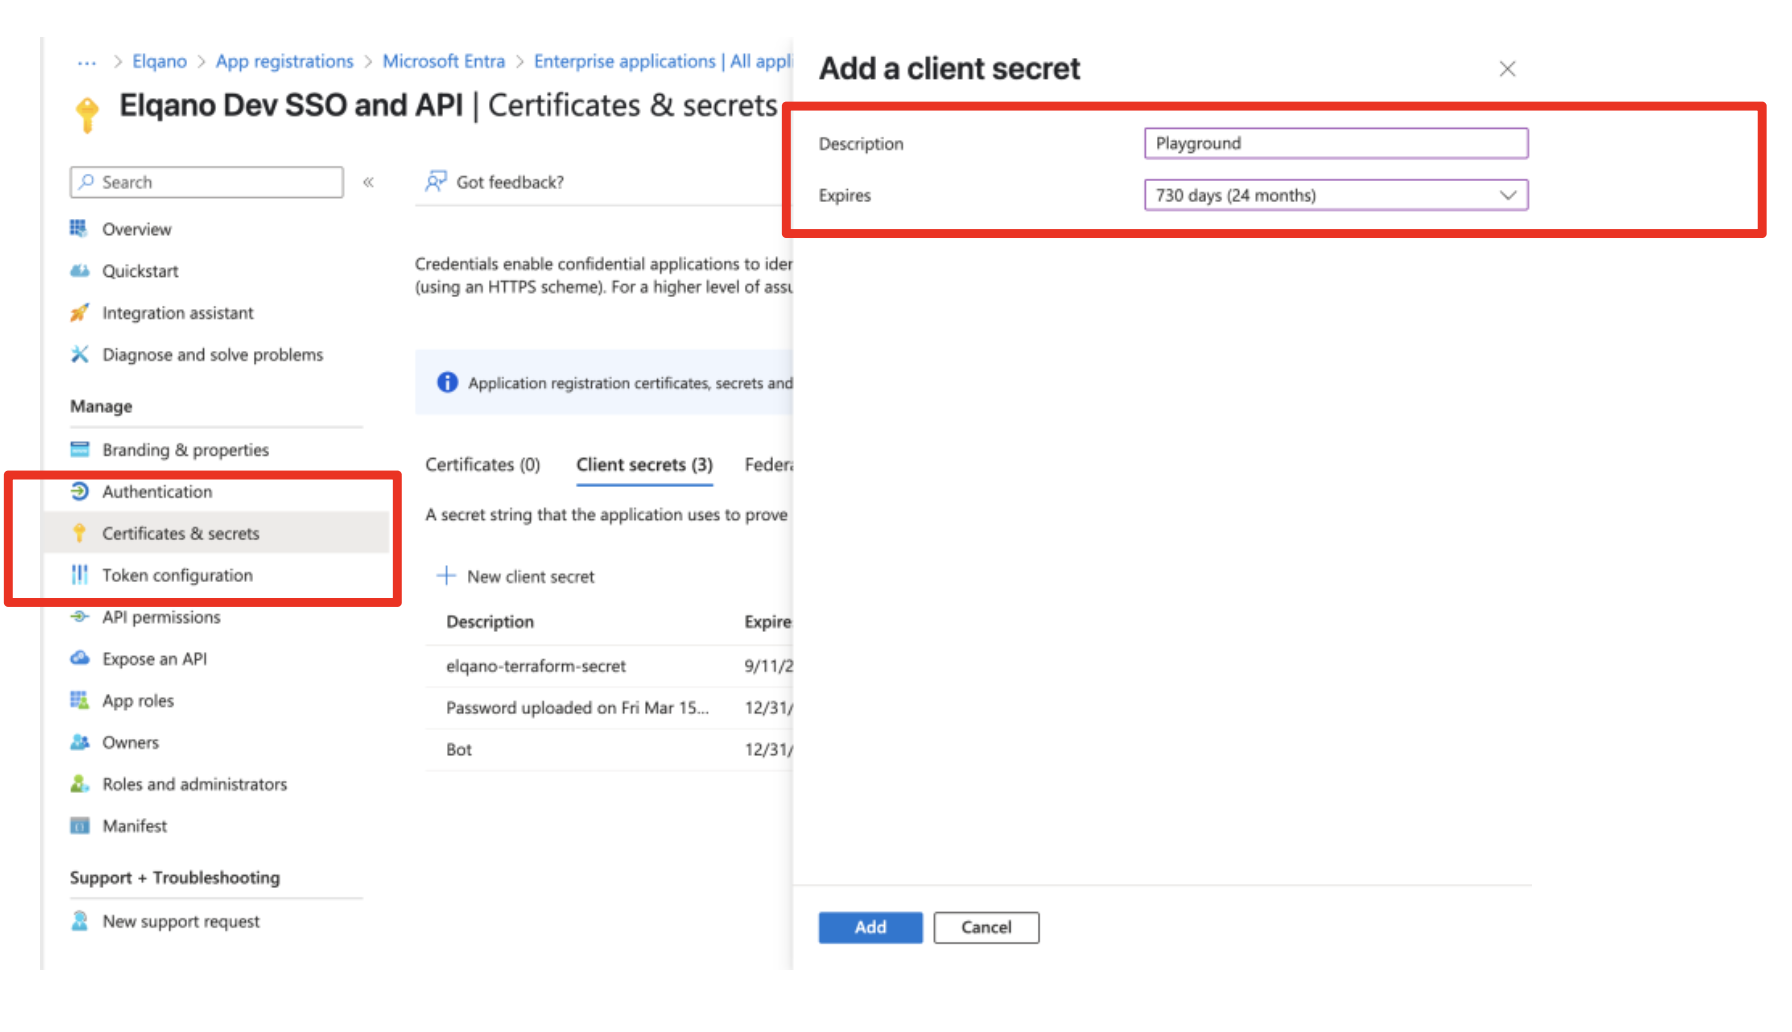
Note
Once you close the page, the secret won’t be shown again
Playground Configuration
Access Playground
Log in to Playground
Create Data Source
- Navigate to My documents
- Click the + button
- Choose a Data Source name
- Click Create
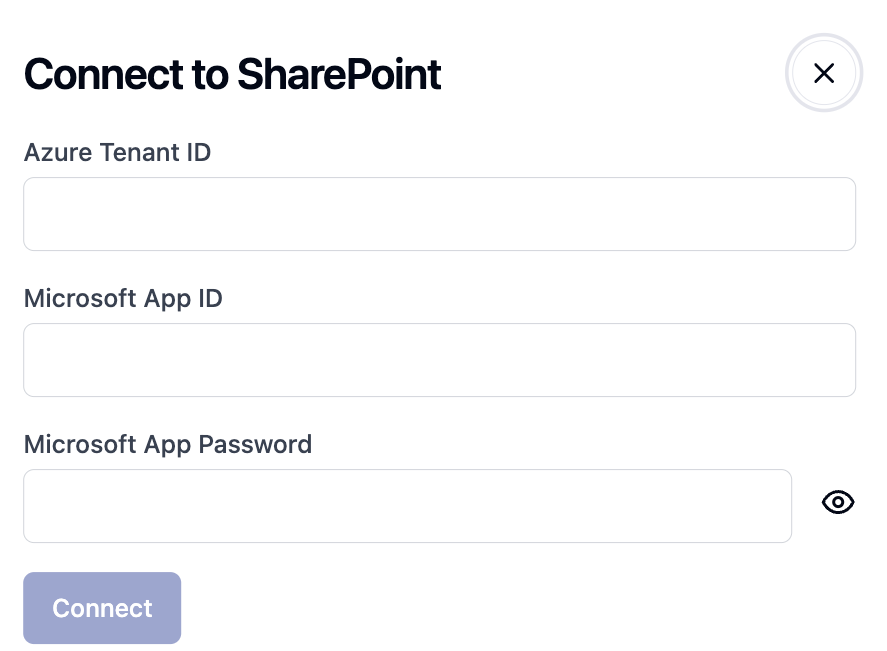
Configure SharePoint Connection
- Open the newly created Data Source
- Click Connect to SharePoint
- Fill out the form using the Azure Tenant ID and Microsoft App ID obtained here and the Microsodt App Password obtained here
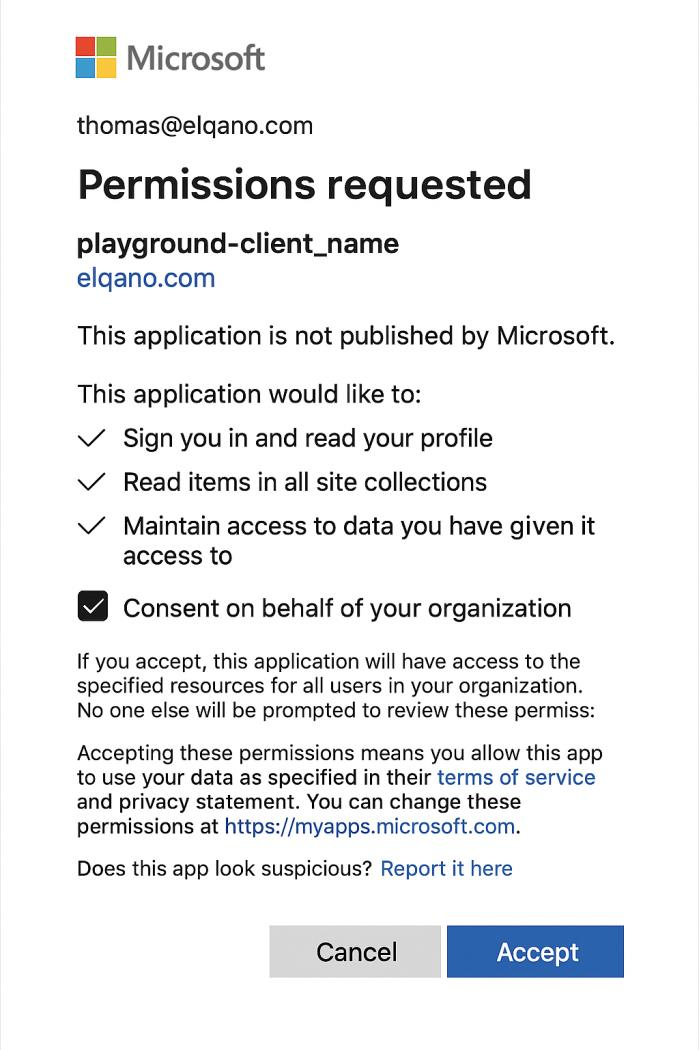
Validate Permissions
- Return to the Chat interface
- A pop-up will appear requesting permission validation
- Follow the prompts to complete the validation
Support
For any assistance or support needs, contact the Elqano Team